
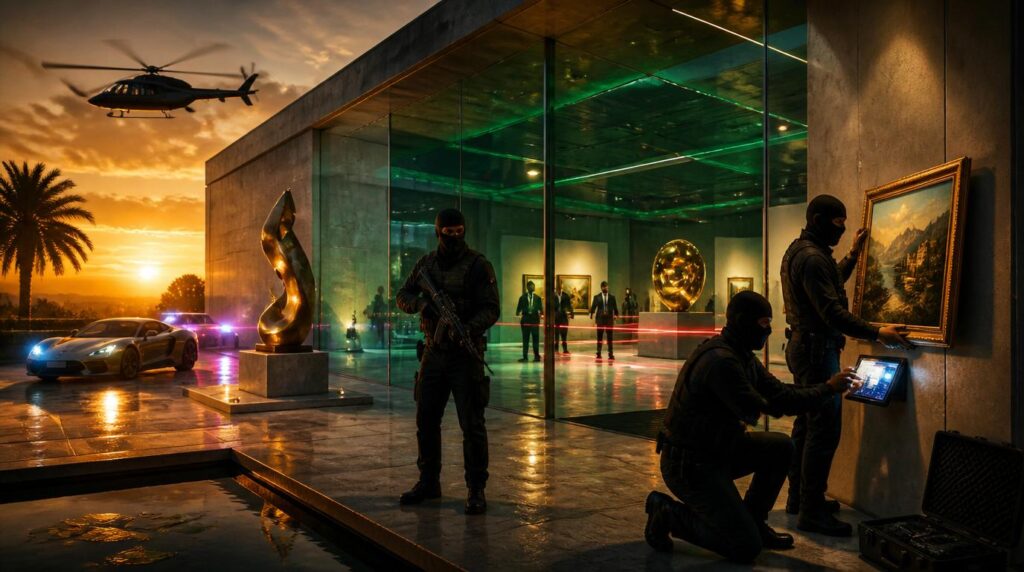
The Kortz Center has sat up in the hills of Pacific Bluffs for years doing absolutely nothing for your bank account — a quiet cultural landmark players drove past on the way to an Agency contract or a Cayo Perico prep run. That changes with The Kortz Center Heist, and it’s about time this gallery earned its keep. This is the setup that finally weaponizes every wasted afternoon staring at overpriced Los Santos art.
This guide gets you the actual meta — not a mission-select summary. You’re getting the optimal Art Studio configuration, the infiltration vector that keeps your cut intact, the loot priority list that separates a good run from a great one, and the Elite Challenge conditions worth chasing for the bonus. If you’re planning to run this heist more than once (and you will), this is the playbook you screenshot before you load in.
Below: setup costs and prep priority, stealth vs. aggressive breakdown, the loot table with payout tiers, the finale walkthrough with Elite Challenge requirements, and the escape route that doesn’t eat your take in body damage and vehicle repairs.
Heist Prerequisites & Setup Costs what you need before you can even scope the place
Rockstar built this heist as a natural extension of the Mansions DLC, and that’s your gate: you need a Mansion fitted with the new Art Studio extension to plan, lead, and configure the operation. No Art Studio, no leader access — you can still get invited into someone else’s crew and pull your cut, but you won’t touch the approach settings, the loadouts, or the finale configuration. If you’re the type who runs heists for a living, that control is worth owning outright.
If you already own a Mansion, plan to drop roughly $2M–$3M on the Art Studio upgrade itself, plus another $8M–$10M across the new heist-specific vehicles, weapons, and gadgets that make the aggressive approach viable. Starting from zero with no Mansion at all pushes your total closer to $25M–$28M. Grind accordingly — a populated bunker sell run or an Agency contract cycle the week before launch pays this down fast.
Inside the Art Studio you’re not just storing paintings, you’re running the whole operation. A resident art counterfeiter works out of the studio producing replicas that get swapped in for the real pieces mid-heist, which is the entire reason this isn’t a smash-and-grab. Two contacts drive the narrative and gate your prep options: Mr. Faber, who’s clearly playing every side of this job, and his fixer Raf De Angelis, who hands out the setup missions.
Mandatory vs. Optional Prep
- Mandatory: intel-gathering scope missions on the Kortz Center itself — you cannot select an approach or unlock the finale without them. Treat these as non-negotiable, first-session priority.
- Mandatory: acquiring the specific forger’s toolkit and materials the counterfeiter needs to produce believable swaps — skipping this tanks your loot quality regardless of how clean your run is.
- Optional but strongly recommended: disrupting the gallery’s private security contractors ahead of time to thin out patrol density and response speed on heist day.
- Optional, aggressive-approach only: securing heavy armor and hardware for crews planning to breach loud. Stealth-focused crews can skip this and reinvest the cash elsewhere.
Run your prep missions with a full four-player crew whenever you can. Setup payouts split evenly, sure, but the time saved on the security-disruption and forger-supply prep more than makes up for the smaller per-head cut, and it gets your crew familiar with the Kortz Center’s layout before finale night.
Infiltration Approaches: Stealth vs. Aggressive how you’re actually getting in
The Kortz Center gives you two fundamentally different entry philosophies, and picking the wrong one for your crew composition is the fastest way to turn a clean payday into a five-star scramble. Both routes get you into the same maze of pavilions — how loud you are getting there is the whole decision.
Subterranean Maintenance Tunnels
Stealth Route- Low guard density, minimal camera coverage compared to the main gallery floor
- Rewards crews who cleared the security-disruption prep — fewer patrols to route around means fewer RNG-based restart triggers
- Best run with suppressed loadouts and a dedicated hacker on cameras and door locks
- Slower clear time, but keeps the wanted level at zero through most of the interior phase
- Ideal for crews prioritizing the Elite Challenge, since a clean stealth run naturally avoids the damage and restart penalties that disqualify you
Helicopter Drop, Glass Pavilions
Aggressive Route- Fast insertion straight onto the gallery roof, breaching down through the pavilion skylights
- Immediate crowd control situation — expect security response within seconds of breach
- Demands the heavy armor prep and a crew that communicates target priority instantly
- Fastest raw clear time when it goes right, worst-case scenario when it doesn’t
- Better suited to crews chasing volume — more runs per hour rather than a single clean Elite Challenge attempt
The meta read for most crews: run stealth on your Elite Challenge attempt, then switch to aggressive for grind sessions once you’ve banked the bonus. Trying to speedrun a stealth approach loud defeats the purpose, and trying to finesse an aggressive breach quietly just gets your point man clipped by the first patrol rotation.
The Loot Table & Payout Breakdown what you’re actually stealing, and what it’s worth chasing
The Kortz Center’s collection isn’t uniform value — some pieces are quick grabs on the way to the vault, others need the counterfeiter’s replica ready before you touch them. Below is the projected loot tiering based on confirmed collection categories and how Rockstar has historically scaled heist loot (Cayo Perico’s primary/secondary target structure is the clearest precedent here). Treat the exact GTA$ figures as launch-week estimates until the patch notes lock them in — the difficulty and priority ordering is the part to actually plan around.
| Loot Type | Est. Max Value | Difficulty |
|---|---|---|
| Signature Collection Painting (primary target, replica swap required) | High — top-tier single payout | Hard |
| Gold Bullion Reserve | High, scales with bag capacity | Medium |
| High-Value Provenance Documents (unlocks bonus objectives) | Medium | Medium |
| Hidden Sculpture Pieces | Medium | Easy |
| Gallery Vault Cash (secondary, opportunistic) | Low–Medium | Easy |
Priority order for any run: secure the signature painting first while the counterfeiter’s replica window is freshest, then work down through bullion and documents as your crew clears rooms. Sculpture pieces and loose vault cash are what you grab on your way to the extraction point — never detour for them if it costs you time on the primary target.
Optimal crew size for maximum per-player efficiency is two to three players. Four-player crews clear rooms faster and split prep work better, but the loot pool doesn’t scale linearly with headcount the way Cayo Perico’s did, so a tight three-person crew running stealth typically nets a higher per-head payout than a four-stack splitting the same primary target.
Step-by-Step Finale Strategy & The Elite Challenge execution inside the pavilions
The Kortz Center’s interior is built as a genuine maze — connected glass pavilions with sightlines that work against you as often as they work for you. Don’t trust your minimap alone on your first few runs; learn the physical layout during prep so you’re not burning clock re-orienting mid-finale.
- Breach and initial sweep. Whichever entry vector you chose, your first priority is establishing which pavilion holds the signature painting. Your hacker or scout should be calling this out immediately, not waiting for a waypoint.
- Deploy the replica swap. This is the moment the Art Studio prep pays off — the counterfeit needs to go up before alarms escalate past the first tier, or you’re stuck fighting for an original that’s now flagged.
- Clear secondary targets on the move. Bullion and documents get grabbed as your crew transits toward the extraction point, never as a separate detour.
- Converge and extract. All crew members should be consolidating toward the exit the moment the primary target is secured — stragglers are what turn a clean run into a wanted-level scramble.
The Elite Challenge
Consistent with how Rockstar has structured every Elite Challenge since Cayo Perico, expect the Kortz Center’s version to demand a full clean run rather than just a fast one. Based on the established format, plan your attempt around hitting all of the following:
- Time limit: a strict finale completion window, likely in the same range as recent heist Elite Challenges — tight enough that you need a rehearsed route, not a first attempt.
- Zero restarts: one continuous run from breach to extraction. Any checkpoint restart voids the bonus.
- No crew member goes down. Damage taken is one thing; getting fully downed and revived is what typically breaks Elite eligibility.
- Precision requirement: expect a headshot or accuracy threshold on the aggressive path, consistent with prior finales that reward clean gunplay over spray-and-pray clearing.
Landing the Elite Challenge on top of your loot payout is historically worth a substantial GTA$ bonus on release week specifically, on top of the standard completion bonus — Rockstar has front-loaded Elite rewards on every heist launch to push engagement, and there’s no reason to expect the Kortz Center to break that pattern.
The Meta Escape Route getting out without eating your own payout
Pacific Bluffs sits close enough to the coast and far enough from a GTA$ police presence that your extraction plan should lean into terrain, not firepower. The moment your crew hits five stars, the instinct to fight through it is exactly what shaves value off your final cut through vehicle damage and repair costs.
- Pre-stage a fast, low-profile vehicle near your planned extraction point during prep — don’t rely on whatever’s parked outside when alarms trip.
- Break line of sight before you break the chase. Cutting through the Pacific Bluffs hillside terrain loses pursuing units faster than a straight highway run.
- Avoid firefights during extraction entirely if you ran stealth. Every bullet that hits your vehicle or your character is value leaving your payout; the wanted level decays on its own if you commit to breaking contact rather than trading shots.
- Aggressive-approach crews should pre-position a getaway aircraft rather than a ground vehicle — the hillside road network works against you if NOOSE response gets a visual.
- Never split the crew during extraction. A downed teammate outside the vehicle radius resets your clean-run status and can cost you Elite Challenge eligibility even after a flawless interior run.
Run the Kortz Center enough times and the extraction becomes muscle memory faster than the interior does — it’s the one phase of this heist where discipline matters more than raw skill. Lose the stars clean, bank the full payout, and get back in the lobby for the next run.