
Stumbling into a Trial Chambers Minecraft structure for the first time feels less like exploration and more like being handed a locked weapon vault with no key — the deep slate corridors are disorienting, the spawner pods trigger on your first careless step, and half the fun is not knowing which room is about to summon a Breeze. That tension is exactly what makes the biome worth mastering.
This guide breaks the entire structure down to its mechanical core: how the Trial Spawner actually scales its difficulty, when it’s worth flipping a run into Ominous mode for better Ominous Vault loot, and how to walk out with a Heavy Core in your inventory instead of a respawn screen.
SECTION 01What Are Trial Chambers & How to Find Them
Trial Chambers Minecraft structures generate exclusively within the deep dark strata, buried inside dense pockets of tuff, deep slate, and deep slate bricks well below the usual cave layer. Unlike strongholds or ancient cities, they don’t cluster around a single Y-level — they sprawl horizontally across a lattice of connected rooms, corridors, and vault chambers, which means vertical mining rarely finds one by accident.
Reading the structure before you commit
Every chamber is built from a repeating kit of parts: entry corridors lined with copper-oxide trim, small spawner rooms with a single Trial Spawner, larger arena rooms with two spawners running in parallel, and reward rooms holding either a standard vault or an Ominous Vault. The copper bulbs embedded in the walls double as light sources and step-triggered wiring — watch for the faint click as you cross a room, since that’s the spawner arming itself.
The most reliable route into a Trial Chambers map guide is still the same one veteran explorers used at launch: trade with a cartographer for an explorer map keyed to the trial chambers structure, then tunnel straight toward the marker rather than surface-mining above it. If you’re wondering about how to find trial chambers in 2026 specifically, the generation logic hasn’t changed since release — only the loot tables and mob rotations have been tuned, so older map-based strategies remain fully valid.
Bring a stack of torches you don’t mind losing and a way to mark dead ends; the corridors loop back on themselves constantly, and it’s easy to re-clear a room you already looted.
Deep slate muffles most ambient cave sounds, so audio cues from a Trial Spawner activating are your earliest warning — don’t rely on sight alone in these tight corridors.
SECTION 02Mechanics of the Trial Spawner
The Trial Spawner is the single mechanical piece that defines the entire biome, and it behaves nothing like a vanilla monster spawner. It doesn’t loop endlessly — it runs a finite wave count, then locks into a cooldown state and stops producing mobs until enough time passes or new players walk into its detection radius.
Three variables control how brutal a given room feels:
- Player count scaling — a Trial Spawner detects every player within roughly a 14-block radius and adds extra mobs and extra loot rolls per additional player, so a four-person party fighting one spawner will face a noticeably longer wave than a solo run.
- Cooldown windows — after a spawner exhausts its wave, it enters a lockout period (roughly 30 minutes for a single-player detection, shorter with more players sharing the load) before it can be re-triggered, which matters if you’re farming the same structure repeatedly.
- Ejector output — once a wave is cleared, the spawner itself ejects loot directly from its core, separate from whatever the vault at the end of the hallway holds.
Standing just outside the detection radius before pulling mobs one at a time is the single highest-value habit you can build here — it turns a chaotic multi-mob spawn into a manageable, corridor-fed line.
SECTION 03Standard vs. Ominous Trials
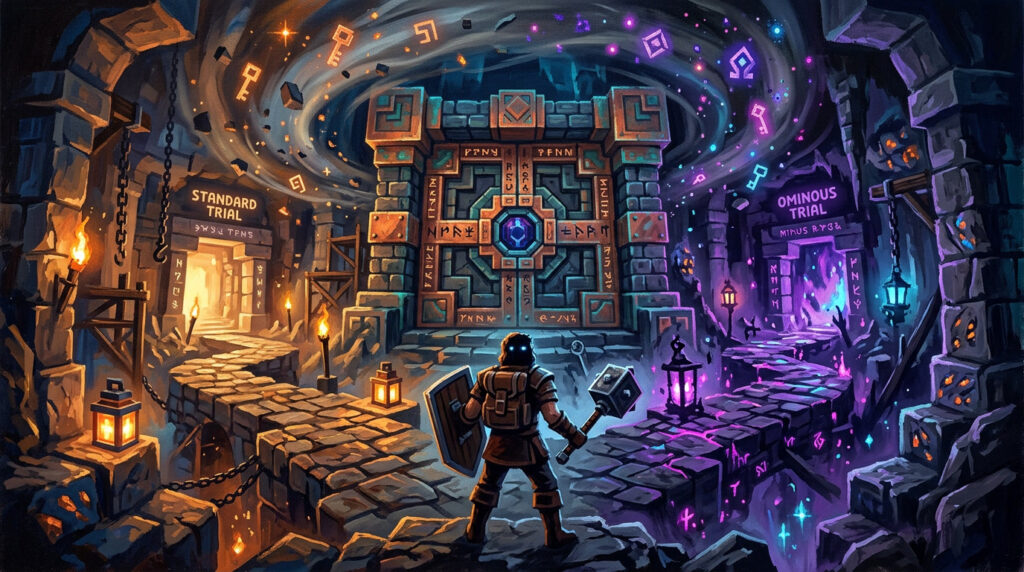
Every Trial Chambers Minecraft run can be played two ways, and the difference isn’t cosmetic. A standard trial plays out with normal difficulty scaling and rewards a regular vault key on wave completion. An Ominous trial is triggered the moment a player carrying the Bad Omen status effect walks into a spawner’s detection range — Bad Omen converts into the Trial Omen effect, which reroutes every spawner and vault in that room onto the harder track.
Bad Omen itself only comes from killing a raid captain on the surface, so you have to plan ahead: no captain kill means no access to Ominous Vault loot at all, regardless of how deep you dig.
| Factor | Standard Trial | Ominous Trial |
|---|---|---|
| Trigger | Default state, no effect required | Bad Omen → converts to Trial Omen on spawner activation |
| Mob density | Baseline wave count per player | Higher wave count, tougher variants more frequent |
| Vault key | Standard Trial Key (single-use, one vault) | Ominous Trial Key (single-use, Ominous Vault only) |
| Loot quality | Solid early-to-mid gear, enchanted books | Ominous Vault loot skews toward top-tier enchants and Heavy Cores |
| Risk level | Manageable for a geared solo player | Recommend full netherite kit and backup gear |
Farm a raid captain first, keep Bad Omen active, then walk into the chamber — an Ominous Trial Key only opens its matching Ominous Vault, so don’t waste one on a standard vault door by mistake.
SECTION 04Key Mobs & Combat Tactics
Two mobs define combat inside the chambers, and neither responds well to standard melee-and-forget habits. Learning proper Breeze mob tactics early will save more gear than any armor upgrade.
Breeze
Ranged / Wind-based · Amethyst-adjacentThe Breeze fires compressed wind bursts that knock you backward and can launch you into hazards or off ledges in tight corridors. It also floats erratically, which makes melee tracking frustrating.
Close the gap fast rather than trading ranged hits — a shield timed to the wind charge negates the knockback, and a bow with punch removed works better than one with punch added. This is the core of any workable wind charges strategy: control your positioning before the Breeze controls it for you.
Bogged
Ranged / Poison arrows · Swamp-adjacent variantBogged mobs fire arrows that inflict poison and prefer to kite in open rooms, which the arena-style trial rooms hand them freely.
Break line of sight using the room’s own pillars, or rush with a sword the moment it nocks an arrow — the wind-up is longer than a skeleton’s, and punishing that gap is the fastest way to shut down its damage output entirely.
In multi-spawner arena rooms, a Trial Spawner rarely activates alone — expect a Breeze and a Bogged pressuring you from different angles while melee mobs close the middle distance. Fighting with your back against a corridor entrance limits how many angles they can use against you.
SECTION 05Rewards & Vault Loot Tables
Every vault in a Trial Chambers Minecraft run needs its matching key before it will open — Standard Trial Keys for standard vaults, Ominous Trial Keys for Ominous Vaults — and each key is consumed the instant the vault door swings open, so one cleared spawner room buys exactly one loot pull.
STDStandard Vault
- Enchanted diamond gear (random slot)
- Music discs, ominous bottles (rare)
- Emeralds, iron, and crafting materials
- Enchanted books, occasionally high-tier
OMIOminous Vault
- Ominous Vault loot skewed toward max-level enchants
- Heavy Core — the Mace’s exclusive crafting component
- Wind Charges in bulk stacks
- Higher density of enchanted diamond/netherite gear
Heavy Core drop rate and the Mace
The Heavy Core is the item most players are actually farming Ominous Vaults for, since it’s the only crafting ingredient needed alongside a Breeze Rod to build the Mace — currently the hardest-hitting melee weapon obtainable through legitimate survival play. The heavy core drop rate is intentionally low per individual Ominous Vault, which is why repeat runs through freshly generated or reset chambers matter more than grinding one location on cooldown.
- Heavy Core (Ominous Vault only) Low roll chance
- Wind Charge stacks (Ominous Vault) High roll chance
- Max-enchant diamond/netherite gear (Ominous Vault) Moderate roll chance
- Enchanted books, tier-dependent (Standard Vault) Moderate roll chance
If the Mace is your end goal, plan a route through several chambers in one expedition rather than expecting a single Ominous Vault loot pull to hand you a Heavy Core outright — treat each vault as one ticket in a larger drawing, not a guaranteed reward.
SECTION 06Pro Tips
- Chain a raid captain kill right before diving underground — Bad Omen has a real-time duration, and wasting it topside means arriving at the chamber with no access to Ominous Vault loot at all.
- Pull spawners into corridors instead of fighting in open arena rooms; a Breeze’s wind bursts have far less room to knock you into a pit when you’re boxed in by deep slate walls.
- Carry spare shields specifically for Breeze mob tactics — the knockback negation matters more than raw armor value in these fights.
- Don’t pop every Trial Spawner in a structure back-to-back; the cooldown windows mean a partially-farmed chamber can still be worth a return trip later instead of a full re-clear.
- Bank your Ominous Trial Keys mentally against vault count before entering — walking in with three keys and only two Ominous Vaults left wastes a full trial’s worth of effort.
None of this requires luck once the mechanics click — a Trial Chambers Minecraft run rewards preparation more than any other current-generation structure, and the players walking out with a Heavy Core in hand are usually the ones who treated the Trial Spawner as a puzzle to route around, not just another mob generator to tank through.