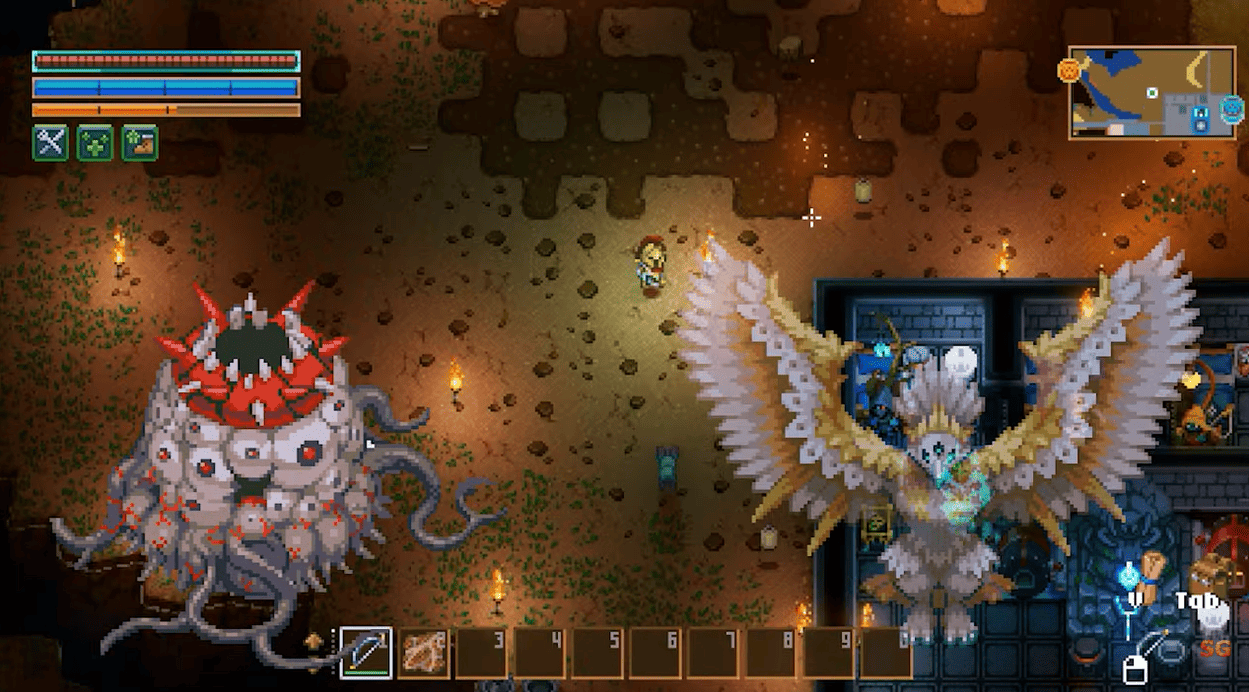
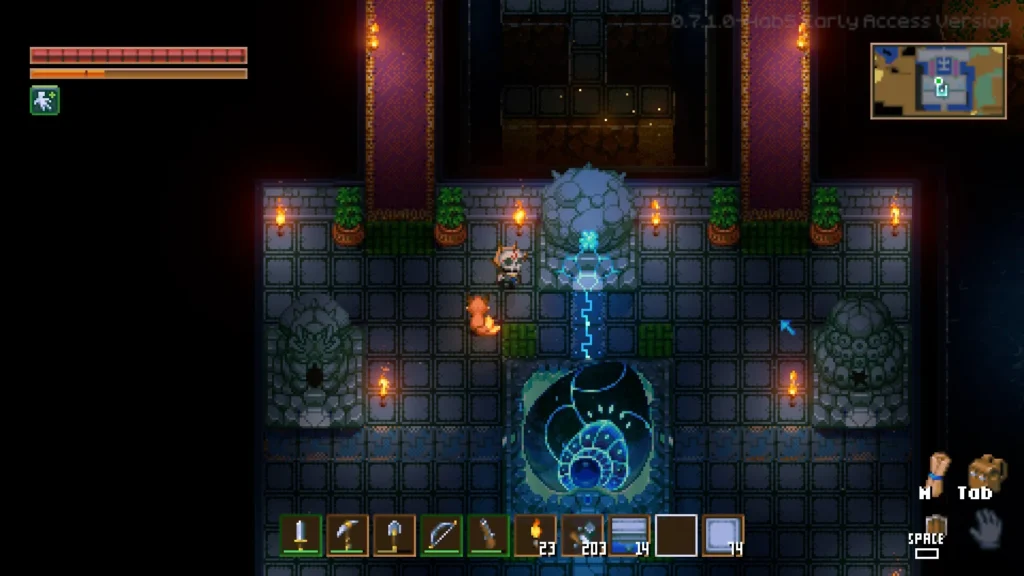
Core Keeper drops you into a dark cave with a wooden pickaxe and almost no instructions. The game never tells you where to go next, which is exactly why so many new players stall out after the first hour. But beneath the dirt and confusion is one of the most satisfying progression loops in the survival-crafting genre: mine ore, craft better gear, defeat a boss, unlock a new biome, repeat. With 19 bosses, 10 biomes, and 1,593 crafting recipes, the underground world is vast — and without a map, it is easy to dig in circles. This walkthrough lays out the entire journey in order: what to do in your first hour, which bosses gate which biomes, how your gear should scale from wood to galaxite, and the base-building principles that separate a temporary camp from an automated fortress.
Your First Hour: From Spawn to First Boss
You wake beside the Core — a glowing statue in an otherwise empty dirt cave. This is your hub, your respawn point, and your crafting nexus. Everything you build should radiate outward from here. Do not wander far yet. The first hour is about establishing the four pillars of survival: light, tools, food, and a bed.
First Hour Checklist
The starting tools are too slow. Gather 4 Wood and craft replacements immediately at the Core.
Unlocks torches, doors, chests, and the wooden bridge — essential for crossing gaps.
Build the bed at the Core. If you die, you respawn here instead of losing progress.
Raw food heals poorly. Cook at a Campfire for 3x healing and hunger satisfaction.
Copper armor and sword are the minimum for fighting Glurch. Look for orange ore in dirt walls.
Pro tip: Dig in a straight line from the Core in any direction. The Dirt Biome extends roughly 40-60 tiles before you hit the Clay Caves. Place torches every 8-10 tiles so you can always find your way back. If you see a large pool of purple slime on the ground, you are close to Glurch the Abominous Mass — your first boss.
Boss Progression: The Full Order
Bosses are the spine of Core Keeper’s progression. You do not just fight them for loot — you fight them because each major kill literally unlocks the next layer of the map. Boss drops are used to craft Scanners at the Core, and each Scanner points you toward the next boss. Skip a boss, and you cannot find the next one. Here is the full recommended order.
| # | Boss | Biome | Key Drop | What It Unlocks |
|---|---|---|---|---|
| 1 | Glurch the Abominous Mass | Dirt Biome | Glurch Eye | Ghorm Scanner |
| 2 | Ghorm the Devourer | Underground Ring | Ghorm’s Horn | Hive Mother Scanner |
| 3 | The Hive Mother | Clay Caves | Hive Mother Heart | Malugaz Scanner + Iron Ore |
| 4 | Malugaz the Corrupted | Forgotten Ruins | Malugaz’s Mask | Azeos Scanner + Scarlet Ore |
| 5 | Azeos the Sky Titan | Azeos’ Wilderness | Azeos’ Soul | Ivy Scanner + Octarine Ore |
| 6 | Ivy the Poisonous Mass | Sunken Sea | Ivy’s Stinger | Omoroth Scanner |
| 7 | Omoroth the Sea Titan | Sunken Sea | Omoroth’s Tentacle | Morpha Scanner + Galaxite Ore |
| 8 | Morpha the Aquatic Mass | Forlorn Metropolis | Morpha’s Bubble | Atlantean Worm Scanner |
| 9 | Atlantean Worm | Forlorn Metropolis | Atlantean Worm Crystal | Ra-Akar Scanner + Solarite Ore |
| 10 | Ra-Akar the Sand Titan | Desert of Beginnings | Ra-Akar’s Fragment | Endgame content + Pandorium |
How Scanners work: After defeating a boss, take its drop to the Core. Open the Core’s crafting menu and craft the next Scanner. Place it in your hotbar, activate it, and follow the directional ping. The ping gets stronger as you approach the boss. Early bosses spawn at fixed distances from the Core in random directions; later bosses require entering new biomes unlocked by previous kills.
Early Boss Strategies
Glurch the Abominous Mass · Dirt Biome
A giant purple slime that bounces toward you in a large arena covered in slime. Its attack pattern is simple: leap, land, pause, repeat. The slime on the ground slows your movement, so mobility is your enemy.
Strategy:
Clear the slime around the arena edges before engaging. Use a Copper Sword minimum. Kite Glurch in a circle — attack during its landing pause, then back away. Bring 10+ cooked Heart Berries. Do not get cornered; the walls will trap you.
Ghorm the Devourer · Underground Ring
A massive beetle that circles the entire map underground, carving a tunnel as it moves. You will hear it before you see it — the screen shakes when Ghorm is near. It charges in a straight line and deals heavy contact damage.
Strategy:
Build a fighting platform 4-5 tiles wide in Ghorm’s tunnel path. Stand on the platform and attack as it passes underneath. A Slingshot or Bow lets you damage Ghorm safely from above. Iron-tier gear recommended. Place torches along the tunnel so you know when it is coming.
The Hive Mother · Clay Caves
A giant insect queen in a larva-filled chamber. She spawns larva minions continuously and charges at the player. The room is cramped, making dodge rolls essential.
Strategy:
Clear larva eggs before waking the Hive Mother. Use a ranged weapon to damage her while clearing adds. Iron Armor and an Iron Sword are minimum. Bring healing food that also gives movement speed buffs. Focus on dodging her charge — it has a long wind-up.
Biome Breakdown: What Awaits in Each Layer
Core Keeper’s underground world is divided into distinct biomes, each with unique ores, enemies, and hazards. You cannot reach later biomes without defeating the bosses that precede them. Here is what to expect in each.
| Biome | Difficulty | Key Ores | Key Resources | Boss |
|---|---|---|---|---|
| Dirt Biome | ★☆☆☆☆ | Copper | Wood, Fiber, Mushrooms, Heart Berries | Glurch |
| Clay Caves | ★★☆☆☆ | Tin | Clay, Larva Meat, Hive Mother materials | Hive Mother |
| Forgotten Ruins | ★★★☆☆ | Iron, Scarlet | Ancient Gemstones, Caveling parts | Malugaz |
| Azeos’ Wilderness | ★★★★☆ | Octarine | Glow Tulips, Solarite (rare) | Azeos |
| Sunken Sea | ★★★★☆ | Galaxite | Fish, Seaweed, Bubble shells | Ivy, Omoroth |
| Forlorn Metropolis | ★★★★★ | Solarite | Tech scrap, Atlantean artifacts | Morpha, Atlantean Worm |
| Desert of Beginnings | ★★★★★ | Pandorium | Sandstone, Cactus fruit, Titan souls | Ra-Akar |
| Molten Quarry | ★★★★☆ | None (combat zone) | Lava crystals, Fire-related loot | Optional |
| Passage | ★★☆☆☆ | Varies | Mixed resources from adjacent biomes | None |
Biome transitions are gated by walls. You cannot mine into the Clay Caves with a Copper Pickaxe — you need the Hive Mother’s drop to progress. This forces a boss-to-biome rhythm that keeps progression tight and purposeful. Do not waste time trying to dig through impossible walls; if your pickaxe bounces, you need a better boss drop, not more patience.
Crafting Progression: From Wood to Pandorium
Core Keeper’s crafting system is built around workbench tiers. Each new ore unlocks a new workbench, which unlocks new recipes, which enable the next biome. The chain is linear by design — you cannot skip tiers. With 1,593 recipes across 165 ingredients, the key is knowing which crafts matter at each stage.
Basic Workbench · Wood + Fiber
Torches, Wood Door, Wood Bridge, Chest, Campfire, Fishing Rod. Priority crafts: Torches (light), Wood Bridge (cross gaps), Chest (storage), Fishing Rod (renewable food).
Copper Workbench · Copper Bars
Copper Sword, Copper Armor, Copper Pickaxe, Copper Hoe, Health Potion. Priority crafts: Copper Sword + Armor (Glurch minimum), Copper Hoe (start farming), Health Potion (boss fights).
Tin Workbench · Tin Bars (Clay Caves)
Tin Sword, Tin Armor, Tin Can (water storage), Explosives (break hard walls). Priority crafts: Explosives (access hidden areas), upgraded armor before Hive Mother.
Iron Workbench · Iron Bars (Forgotten Ruins)
Iron Sword, Iron Armor, Iron Pickaxe, Iron Fishing Rod, Bridge Layer (automated bridge building). Priority crafts: Full Iron set (Malugaz minimum), Iron Fishing Rod (better fish for cooking).
Scarlet Workbench · Scarlet Bars (Forgotten Ruins, rare)
Scarlet Sword, Scarlet Armor, Scarlet Tools. Priority crafts: Scarlet Sword (highest damage before Octarine), Scarlet Armor (significant defense boost).
Octarine Workbench · Octarine Bars (Azeos’ Wilderness)
Octarine Sword, Octarine Armor, Octarine Tools, Octarine Fishing Rod. Priority crafts: Full Octarine set (Ivy/Omoroth fights), Octarine Hoe (advanced farming).
Galaxite Workbench · Galaxite Bars (Sunken Sea)
Galaxite Sword, Galaxite Armor, Galaxite Tools, Galaxite Cooking Pot (advanced recipes). Priority crafts: Galaxite Cooking Pot (endgame food buffs), Galaxite Armor (Morpha/Atlantean Worm).
Solarite Workbench · Solarite Bars (Forlorn Metropolis)
Solarite Sword, Solarite Armor, Solarite Tools, Automation components (conveyor belts, drills, smelters). Priority crafts: Automation components (this is where bases become self-running).
Pandorium Workbench · Pandorium Bars (Desert of Beginnings)
Pandorium Sword, Pandorium Armor, endgame trinkets and accessories. Priority crafts: Full Pandorium set (true endgame gear), endgame trinkets (passive buffs and special abilities).
Base Building: From Camp to Automated Fortress
Your base is not just storage — it is your production pipeline. A well-designed base in Core Keeper does three things: crafts efficiently, stores logically, and farms automatically. The best bases are built around the Core in a compact grid where every station can pull from shared chests.
The Compact Core Hub
Build all crafting stations within 5-6 tiles of the Core. Place chests between stations so they can draw materials automatically. A typical hub layout: Core in the center, workbenches in a ring around it, chests in the gaps, bed and cooking station off to one side. This minimizes walking time, which is the biggest efficiency killer in the early game.
Storage Organization
Use dedicated chests for: Ores & Bars, Food & Ingredients, Building Materials, Boss Drops & Scanners, Seeds & Farming, Fish & Water Gear, and Armor & Weapons. Labeling is critical once you have 20+ chests. In multiplayer, assign chest colors or positions so teammates know where things go.
Farming Setup
Build farms early. A 8×8 plot of tilled soil near water will grow Heart Berries and Mushrooms indefinitely. Later, expand to aquatic crops in the Sunken Sea biome. Place a Sprinkler (unlocked at Iron Workbench) to automate watering. A reliable food supply means you never enter a boss fight underprepared.
Automation (Mid-to-Late Game)
Once you reach the Solarite Workbench, build conveyor belts, drills, and smelters. A basic automation loop: Drill mines ore → Conveyor belt moves ore → Smelter processes ore into bars → Chest stores bars → Workbench crafts gear. Start with one ore type, then expand. Automation is not mandatory, but it frees you to focus on exploration and boss fights instead of manual grinding.
Cooking & Food: The Hidden Power System
Food in Core Keeper is not just healing — it is a buff system. Cooked meals provide health regeneration, maximum health increases, movement speed, attack speed, and mining speed bonuses. A player with optimized food is significantly stronger than one with equivalent gear but poor nutrition.
| Food Stage | Key Recipes | Effects | When to Use |
|---|---|---|---|
| Early (Dirt/Clay) | Cooked Mushroom, Cooked Heart Berry | +20-40 HP, minor regen | General exploration, Glurch fight |
| Mid (Ruins/Wilderness) | Cooked Larva Meat, Bomb Pepper + Fish | +60-100 HP, +attack speed | Malugaz, Azeos fights |
| Late (Sea/Metropolis) | Grilled Fish, Seaweed Wraps, Seafood Stew | +120-180 HP, +movement speed | Omoroth, Morpha, Atlantean Worm |
| Endgame (Galaxite Pot) | Galaxite-tier recipes, Titan Soufflé | +200+ HP, multi-stat buffs | Ra-Akar, post-game content |
Pro tip: Always eat before a boss fight, not during. The buff duration is limited, and the casting animation leaves you vulnerable. Enter the arena with full health and active food buffs, and bring backup cooked food for emergency healing mid-fight.
Multiplayer: Roles & Responsibilities
Core Keeper supports up to 8 players in co-op, and the game changes significantly with a group. Bosses scale in health, but coordination more than compensates. The most effective squads divide responsibilities early.
The Miner
Focuses on ore gathering and exploration. Prioritizes pickaxe upgrades and mining speed buffs. Responsible for finding the next biome and clearing paths to boss arenas.
The Fighter
Prioritizes weapons, armor, and health. Leads boss fights and handles combat encounters. Keeps the team supplied with healing potions and cooked food.
The Builder
Manages the base, crafting stations, storage, and automation. Responsible for farm expansion and ensuring the team returns to a functional, well-stocked hub.
The Angler
Focuses on fishing for rare fish, cooking ingredients, and aquatic resources. Often the first to access mid-tier food buffs that benefit the whole team.
Common Mistakes New Players Make
1. Digging randomly without torches
You will get lost. The underground is a maze, and without a torch trail, retracing your steps is nearly impossible. Place torches on the left wall as you explore — if torches are on your right, you are heading back.
2. Fighting bosses undergeared
Glurch is beatable in Wood gear — technically. But why suffer? Spend 10 minutes mining Copper and crafting the full set. The time investment pays for itself in fewer deaths and faster kills.
3. Ignoring food and farming
Raw Heart Berries heal 15 HP. Cooked Heart Berries heal 45 HP and provide regen. That difference is the difference between winning and losing a boss fight. Build a farm by hour two.
4. Building the base too far from the Core
The Core is your respawn, your crafting nexus, and your scanner hub. Every step you build away from it is a step you will walk thousands of times. Keep your base tight and compact around the Core.
5. Hoarding boss drops
Boss drops have one purpose: crafting the next Scanner. Use them immediately. Sitting on a Glurch Eye for three hours because it “looks rare” just delays your progression for no benefit.
Frequently Asked Questions
What is the recommended boss order in Core Keeper? +
The recommended boss order is: Glurch the Abominous Mass (Dirt Biome), Ghorm the Devourer (underground ring), The Hive Mother (Clay Caves), Malugaz the Corrupted (Forgotten Ruins), Azeos the Sky Titan (Azeos’ Wilderness), Ivy the Poisonous Mass (Sunken Sea), Omoroth the Sea Titan (Sunken Sea), Morpha the Aquatic Mass (Forlorn Metropolis), Atlantean Worm (Forlorn Metropolis), and Ra-Akar the Sand Titan (Desert of Beginnings). Each boss drops materials and unlocks scanners that reveal the next boss location.
How do you find bosses in Core Keeper? +
Bosses are found using Scanner items crafted at the Core. After defeating a boss, it drops a unique material used to craft the next boss’s Scanner at the Core. Place the Scanner in your hotbar and activate it; a directional ping appears on screen pointing toward the boss’s location. Early bosses like Glurch can also be found by following the slime trail in the Dirt Biome.
What should I craft first in Core Keeper? +
Your first crafts should be: a Wood Pickaxe (upgrade from the starting tool), a Basic Workbench (unlocks essential recipes), a Torch (light is everything underground), and a Bed (sets your respawn point). Prioritize finding Copper Ore to craft a Copper Sword and Copper Armor before fighting Glurch. Food is equally critical — cook Mushrooms and Heart Berries at a Campfire early on.
How does the cooking system work in Core Keeper? +
Cooking in Core Keeper uses a Campfire or Cooking Pot. Place ingredients into the cooking slots and wait for the timer to complete. Cooked food restores significantly more health and provides buffs compared to raw ingredients. Early game, cook Mushrooms and Heart Berries. Mid-game, combine fish from the Sunken Sea with spices for powerful healing meals. Late-game recipes from the Galaxite Cooking Pot provide substantial combat buffs and health regeneration.
What is the best base layout in Core Keeper? +
The best base is built around the Core in a compact grid. Place all crafting stations within a few tiles of each other so they can draw materials directly from adjacent chests. Use a central storage room with labeled chests for ores, food, building materials, and boss drops. Build farms for renewable food (Mushrooms, Heart Berries, and later aquatic crops) near water sources. Leave space for automation — conveyor belts, drills, and smelters become essential in mid-to-late game for processing ore automatically.
Sources & Methodology
Game data is sourced from the official Core Keeper Wiki (corekeeper.atma.gg, corekeeper.wiki.fextralife.com), the Steam store page (Pugstorm / Fireshine Games), and verified community guides on Steam Community and VN Paths. Boss health values, drop tables, and biome information reflect game version 1.0+ as of October 2026. Crafting recipe counts and ingredient data are drawn from the Core Keeper Wiki crafting database. Playtime estimates and difficulty ratings are based on aggregated player reports and editorial testing. All strategies and recommendations are original to PinkCrow.net.
More Gaming Guides