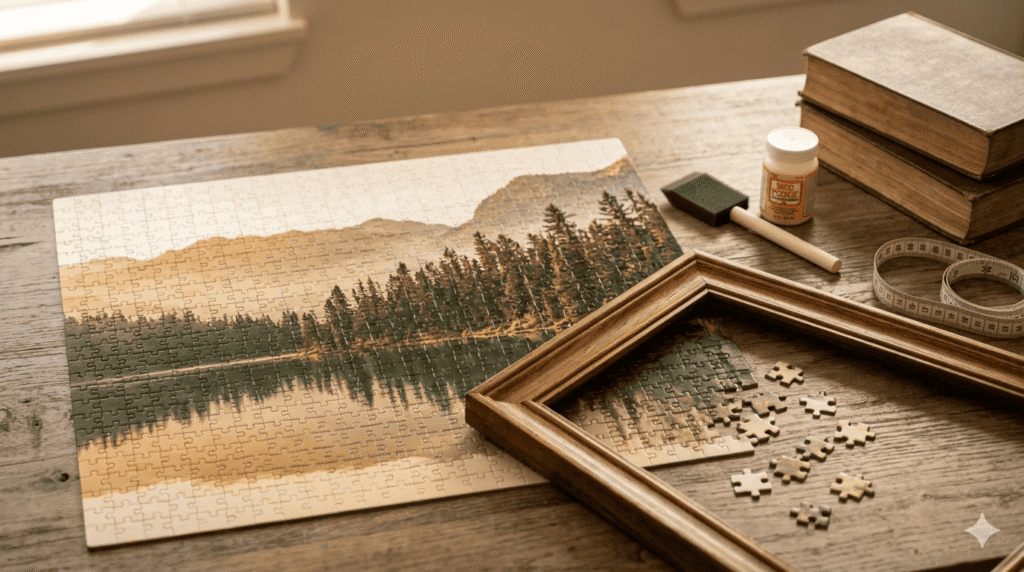
Don’t let your hard work fall apart. Transform your 1,000-piece victory into permanent wall art with these professional techniques — no experience required, just the right steps in the right order.
You’ve spent hours — maybe days — hunched over that puzzle. The last piece clicked into place and you felt that specific joy that only completionists understand. Now what? You leave it on the table for a week, then someone bumps it, and suddenly three hundred pieces are on the floor.
There’s a better ending to that story. Framing a puzzle is more approachable than it sounds. Once you understand the three main methods and master one simple measurement principle, you’re most of the way there. Let’s get into it.
Quick comparison — which method suits you?
| Method |
Cost |
Difficulty |
Durability |
Reversible |
| 1. Glue (Mod Podge) |
$5–$15 |
Easy |
Excellent |
No |
| 2. Adhesive sheets |
$10–$20 |
Easy |
Very good |
Yes |
| 3. Custom framing |
$40–$200+ |
Moderate |
Museum-grade |
Yes (if dry-mounted) |
Before you start: the pre-frame checklist
Rushing this part is how you end up with a warped, dusty disaster behind glass. Spend 20 minutes here and every step that follows becomes dramatically easier.
1
Flatten the puzzle. Set it on a hard, flat surface and weigh it down overnight with heavy books or a cutting board. Even a slight bow will fight you inside the frame and cause warping problems later.
2
Dust carefully. Use a soft, dry paintbrush to sweep dust from the seams. Skip the damp cloth — moisture swells puzzle pieces and throws off your piece alignment.
3
Measure your puzzle dimensions. Measure length and width to the nearest millimeter. Write it down. Then measure again from a different spot — puzzles can bow and give false readings at the center.
4
Check for missing pieces. Do this now, not after gluing and framing. Heartbreaking to discover it later, but far worse to discover it framed on your wall six months later.
5
Account for wiggle room. Add ⅛” (3mm) to each measured side before selecting a frame. The puzzle assembly needs to sit inside the frame lip without force — thermal expansion will crack pieces in a frame that’s too snug.
Your puzzle width
X inches
Add wiggle room
+ ¼” total
Target frame size
X + ¼” wide
A standard 1,000-piece puzzle typically measures around 19″ × 27″ — but every brand is different. Ravensburger, Buffalo Games, and White Mountain all use slightly different piece sizes. Always measure the actual puzzle, not the box.
Method 1 — the classic glue method (Mod Podge)
This is the most popular approach for good reason. Mod Podge (specifically the Puzzle Saver formula) dries crystal clear, seals every joint between pieces, and gives a semi-gloss finish that looks intentional. The catch: once you apply puzzle glue, there’s no going back. This is a permanent commitment.
What you’ll need
- Mod Podge Puzzle Saver (or equivalent puzzle glue)
- A foam brush, 2–3 inches wide
- Wax paper or a silicone baking mat to work on
- A stiff backing board — foam board or corrugated cardboard, cut to puzzle size
- Heavy books for weighting during the drying process
1
Transfer the puzzle to a work surface. Slide a rigid piece of cardboard underneath, then flip the whole thing onto your wax paper. Work slowly. If the puzzle is large, ask someone to hold the other end.
2
Glue the back first. Brush a thin, even coat of Mod Podge across the back of the puzzle. This locks piece positions before you flip it to work on the front. Dry time: 20–30 minutes.
3
Flip and glue the image side. Apply puzzle glue to the front, working in sections. Thin coats are critical here. The glue will look white and opaque when wet — don’t panic, it dries clear.
4
Weight it flat while it dries. Lay wax paper over the top, then stack heavy books over that. This is the single most important step for preventing warping. Leave it for at least 2 hours.
5
Apply a second coat if needed. For extra durability, a second thin coat is worthwhile. Wait until the first is completely clear and dry before applying.
Watch out: the number one cause of warped puzzles is too much glue applied too quickly. Thin coats, thorough drying, and weighting flat solves 90% of all warp problems before they start.
Method 2 — the glue-free approach (adhesive sheets)
Not ready to commit permanently? Adhesive sheets — sometimes marketed as puzzle savers — peel and stick directly to the back of a completed puzzle. No liquids, no warping risk, and the result is surprisingly rigid. You can even reverse the process later with patience.
What you’ll need
- Puzzle saver adhesive sheets — sized to your puzzle (most brands sell multi-packs)
- A rigid foam board backing, cut to puzzle size
- A rolling pin or credit card for smoothing out bubbles
1
Lay the puzzle face-down on a clean, flat surface. Use the cardboard-sandwich flip method: place a rigid board on top of the face-up puzzle, hold both firmly, flip as one unit, remove the top board.
2
Peel the backing off the adhesive sheet and press it onto the back of the puzzle, starting at one edge and rolling outward. Smooth out air bubbles immediately — they’re nearly impossible to fix once fully pressed.
3
Overlap sheets slightly if your puzzle is larger than a single sheet. Most puzzle saver sheets come in A4 or letter size, so a 1,000-piece puzzle needs several overlapping strips. Overlap by at least 5mm.
4
Press the puzzle onto your foam board backing. The adhesive sheet grips the board and holds everything rigid without any glue. Now it’s ready to go straight into a frame.
Pro tip: for a puzzle you might want to disassemble someday, use a low-tack adhesive sheet and keep it separate from the backing board. Months later, you can peel the sheet off carefully and reclaim the pieces.
Method 3 — professional and custom framing
This is the endgame for puzzles that truly matter. A custom-framed puzzle behind UV-protective glass will still look sharp in 30 years. The investment is higher, but for a family heirloom image, a 5,000-piece achievement, or a gift meant to last — it’s the right call.
Choosing the right frame size
Standard frame sizes rarely align with standard puzzle dimensions. This is the core friction point of framing any puzzle. A 19″ × 27″ puzzle doesn’t fit neatly into any off-the-shelf frame without either a gap or a forced squeeze.
You have three realistic options:
- A local custom framing shop — they cut to your exact puzzle dimensions and can add a mat border if you want breathing room around the image. Most shops can turn this around in a week.
- Online custom frame services like Framebridge or Pictureframes.com — you enter your measurements and receive a frame built to spec. Usually cheaper than a local shop and ships to your door.
- Close-enough standard frames — if your puzzle is slightly smaller than a standard frame size, a custom-cut mat fills the gap cleanly and actually adds a professional finishing touch.
The role of foam board in mounting
Custom framing almost always involves a foam board mounting layer. The framer glues or dry-mounts your puzzle-on-backing-board to acid-free foam board, which keeps everything flat and prevents sagging inside the frame over time. If you’re DIYing this step, use archival-grade foam board — standard craft store foam board off-gases over years and can slowly yellow your puzzle image.
When to use UV-protective glass
If the puzzle goes anywhere near direct sunlight — use UV glass, no debate. Standard glass lets UV rays bleach colors within just a few years. UV-protective glass or acrylic blocks 99% of those rays and adds $20–$40 to the cost. For a north-facing wall or a basement display with zero sunlight exposure, standard glass is perfectly fine.
Custom framing checklist
- Measure puzzle to the millimeter — bring the written numbers to the shop
- Choose: flush mount (puzzle fills the full frame) or matted (puzzle floats inside a paper border)
- Specify acid-free mat and backing if archival preservation matters to you
- Ask about UV-protective glass or acrylic glazing, especially for sunlit rooms
- Confirm frame depth — thick cardboard puzzle pieces need a deeper rabbet (the inner lip) than photo prints
Measuring puzzle dimensions accurately
This one technical step trips up more people than any gluing technique. Here’s the precise approach professionals use:
- Use a metal ruler or rigid tape measure — not a fabric tape, which stretches under tension.
- Measure from outer edge of piece to outer edge, at least in two spots per side — at the center and at one end.
- Use the smallest measurement as your baseline. The frame needs to accommodate the narrowest point, not the widest.
- Add ⅛” (3mm) of wiggle room per side — that’s ¼” total per dimension — for the final frame inner dimension.
Example: puzzle measures 18.75″ × 26.5″. Add ¼” to each dimension → target frame inner size = 19″ × 26.75″. Look for a 19″ × 27″ frame, or order a custom at 19″ × 26.75″ exactly.
The frame lip (the inner edge that overlaps the puzzle) typically covers 3–5mm of the puzzle edge. Account for this when you care about not losing any of the image — either choose a shallow lip, or deliberately measure and leave a small border of background-colored pieces around the image.
Common questions answered
Can I use a standard photo frame to frame a puzzle?
Sometimes — but only if your puzzle dimensions happen to be close to a standard photo size (8×10, 11×14, 16×20, 18×24, etc.). Most puzzles won’t match. If you’re within half an inch, a custom-cut mat can bridge the gap. Beyond that, you’ll need a custom frame or the puzzle will either rattle around loosely or get forced into an ill-fitting frame that stresses the pieces at the edges.
How do I flip the puzzle without it breaking?
The two-board method. Slide a rigid piece of cardboard or thin plywood under the puzzle. Place another board of the same size on top. Hold both boards firmly together — top and bottom — and flip the entire sandwich in one confident motion. Set it down gently on a carpet or non-slip surface, then remove the top board carefully. Never try to flip a large puzzle by hand without a supporting surface on both sides.
What is the best glue for puzzles?
Mod Podge Puzzle Saver is the gold standard — it dries clear, doesn’t yellow over time, and is available everywhere. Dedicated puzzle glues from Ravensburger and Educa are also excellent and formulated specifically for cardboard pieces. Avoid standard PVA school glue (too watery, serious warping risk) and craft glue sticks entirely — they lack the bonding strength for a permanent seal across hundreds of seams.
Does gluing a puzzle damage it permanently?
Yes, fully and irreversibly. Puzzle glue is a permanent sealant — once applied and cured, you cannot separate the pieces again. If there’s any chance you’d want to disassemble this puzzle in the future (to redo it, share the pieces, or store it), use Method 2 with adhesive sheets. That’s the only approach that preserves both rigidity and reversibility.
My puzzle is warping after gluing. What do I do?
Act immediately while the glue is still somewhat pliable. Place the puzzle face-down on a flat, hard surface, lay wax paper over the back, and stack the heaviest books you own across the entire surface. Leave it for several hours or overnight. Once Mod Podge fully cures (24–48 hours), warping becomes very difficult to reverse — which is why weighting during the initial drying is non-negotiable, not optional.
Should I frame the puzzle with or without glass?
Glass is strongly recommended for long-term preservation. It keeps dust off the surface, protects against humidity fluctuations, and — if you choose UV glass — blocks the light that bleaches colors over time. The only situation where skipping glass makes sense is if the puzzle has significant texture you want to remain tactile, or if cost is a genuine constraint and the display location has no sunlight exposure whatsoever.