A Definitive Walkthrough for Completionists, Lore Hunters, and the Newly Cursed
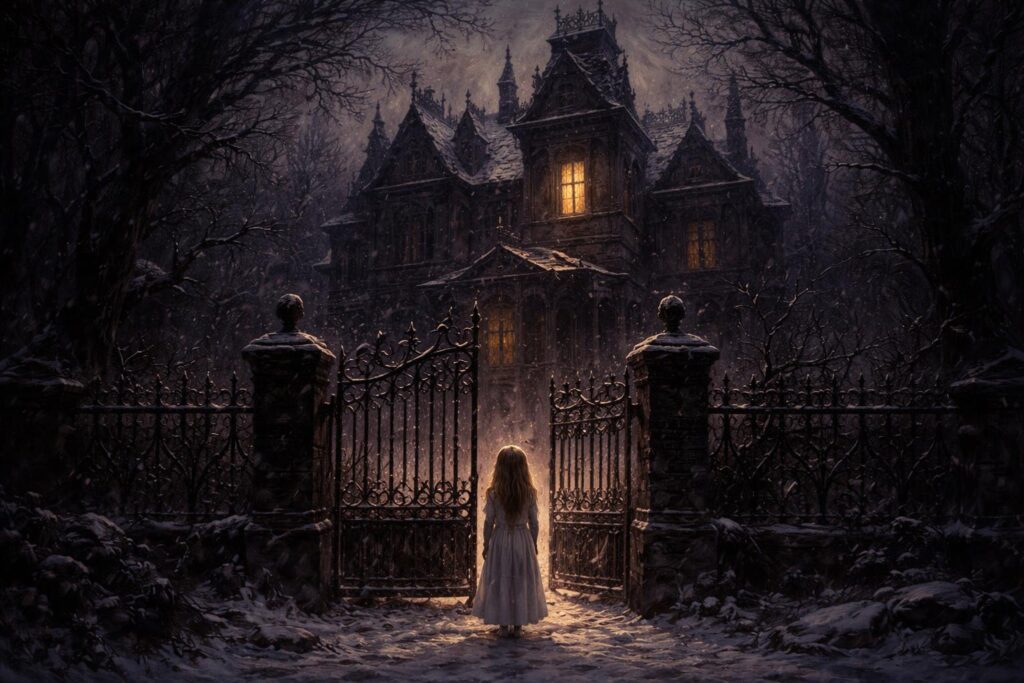
There is something deeply wrong with the house at the end of the road.
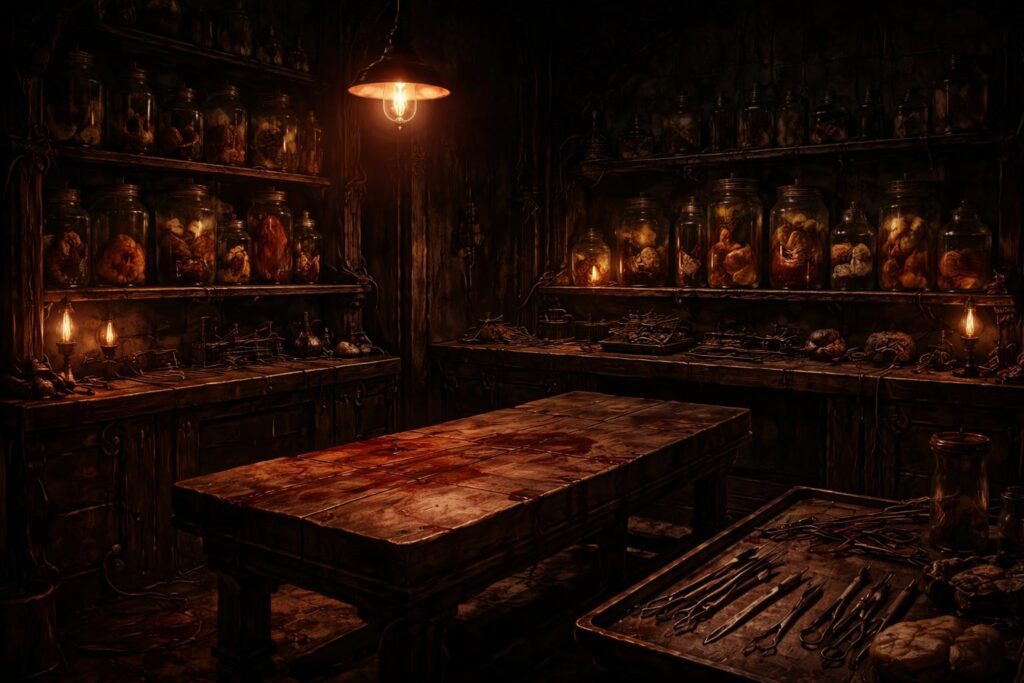
You sense it the moment Mad Father begins — the candlelight flickering against stone walls, the distant sound of something dragging across the floor above you, and a little girl in a white nightgown running toward the only person she has ever trusted. That person is her father. That trust is the game’s most devastating lie.
Originally released in 2012 by Japanese developer Sen (aya), Mad Father carved its name into the canon of RPG Maker horror alongside Yume Nikki, Ib, and The Witch’s House. Where those games leaned into surrealism or puzzle-box tension, Mad Father chose something rawer: the horror of family, of inherited sin, and of the lengths a child will go to preserve a love that was never entirely deserved. It became a cult classic almost immediately, passed between players in whispered forum threads and YouTube playthroughs, its True Ending becoming one of the most discussed conclusions in the genre.
The 2020 Remake, developed by PLAYISM and Miscreant’s Room, didn’t just polish the original — it expanded it. New sprites, redrawn environments, a reworked soundtrack, and most importantly, the addition of Blood Mode and the IF Mode story expansion fundamentally deepened the experience for veterans while making the game more accessible than ever to newcomers.
This Mad Father walkthrough serves as the single most complete guide to both versions of the game. Whether you’re hunting all 21 Gems, chasing the True Ending, or trying to piece together the full tragedy of the Drevis family, you are in the right place. Steel yourself. The doctor will see you now.
If you enjoy the psychological edge of Mad Father, you might also want to explore our roundup of the best horror games that have defined the genre.
Mad Father Remake vs. Classic: What Actually Changed?
For returning players considering a double-dip, or new players deciding which version to play, the differences between the 2012 Classic and the 2020 Remake are more substantial than a simple visual refresh.
Visual and Audio Overhaul
The most immediate change is the art. The Remake replaces the Classic’s lo-fi RPG Maker sprites with fully redrawn, high-definition character artwork that leans into a gothic storybook aesthetic — think Little Red Riding Hood reimagined by someone with a formaldehyde collection. Aya’s design is softer but more expressive. The mansion’s environments are denser, richer in detail, and genuinely beautiful in a deeply unsettling way. The soundtrack receives a full orchestral rearrangement, with several tracks adding choir elements that make the basement sequences feel considerably more oppressive.
Mechanical Improvements
The Remake smooths out several friction points that frustrated Classic players. Item management is more intuitive, the Chainsaw sequences — some of the most iconic and panic-inducing moments in the game — feature improved hitbox clarity, and the save system is slightly more forgiving in pacing. The Classic’s occasional pixel-hunt puzzle design has been subtly revised so that critical interactive objects are more visually distinguished from background detail.
Blood Mode and IF Mode
These are the two headline additions exclusive to the Remake and deserve their own deep-dive section below. In brief: Blood Mode increases the game’s graphic content, restoring and expanding on violence that was toned down in some regional releases of the Classic, while IF Mode is an entirely new story route that functions as an alternate-timeline epilogue.
Remake vs. Classic Comparison Table
| Feature | Classic (2012) | Remake (2020) |
|---|---|---|
| Art Style | Lo-fi RPG Maker sprites | High-definition redrawn artwork |
| Soundtrack | Original chiptune/synth score | Full orchestral rearrangement |
| Blood Mode | Not available | Toggleable — adds graphic content |
| IF Mode | Not available | Unlockable story expansion |
| Puzzle Design | Occasional pixel-hunting | Revised for clarity |
| Chainsaw Sequences | Original hitboxes | Improved hitbox detection |
| Save System | Standard | Slightly more generous pacing |
| Platform Availability | PC (original release) | PC, Nintendo Switch, PS4 |
| Recommended For | Purists, genre historians | New players, completionists |
The Verdict:
Unless you have a specific attachment to the original’s rougher aesthetic, the 2020 Remake is the definitive way to experience Mad Father. It is strictly superior in almost every measurable dimension — and IF Mode alone is worth the price of re-entry for veterans.
The Complete Endings Guide
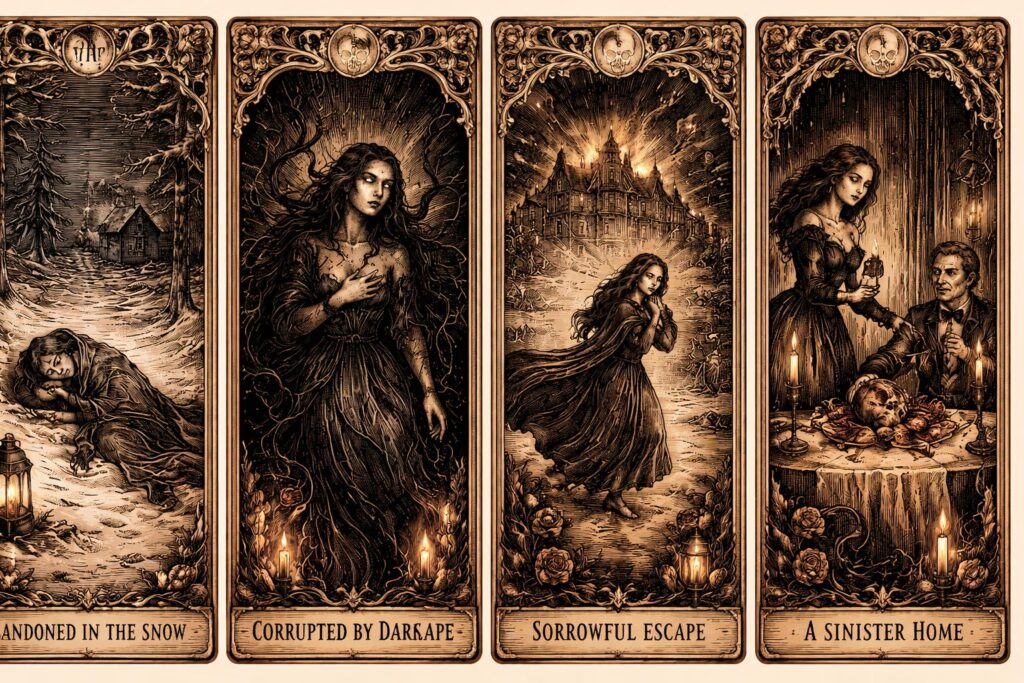
Mad Father has four distinct endings, each determined by your choices and whether you’ve collected the necessary items throughout the game. Understanding the ending system is essential to any serious Mad Father walkthrough, and the differences between outcomes cut right to the thematic heart of the story.
There are no mid-game checkpoints for ending flags — your preparation begins the moment you start playing.
✦ Featured Snippet Optimized: How to Get the True Ending in Mad Father
- Collect all 21 Gems hidden throughout the Drevis mansion.
- Acquire the Mandrake Root from the garden area.
- Speak to every NPC ghost/spirit when prompted — do not skip interactions.
- Obtain the Star Brooch during the laboratory sequence.
- In the game’s finale, choose to save your father rather than abandon him.
- Present the collected gems when the game prompts you to do so.
- Watch the extended True Ending cutscene — and pay close attention to the very final scene, which recontextualizes the entire story.
Bad Ending 1: The Abandonment
This ending is reached by failing to collect sufficient gems and choosing not to attempt to save Alfred Drevis during the final confrontation. Aya escapes the mansion alone. The ending is brief, bleak, and offers no resolution — she walks into the snow, her father’s fate unconfirmed, the mansion’s curse presumably unbroken. It is thematically consistent with a reading of Aya as a child finally choosing self-preservation over a toxic parental bond, but the game frames it as a failure state rather than a liberation.
How to trigger it: Simply neglect gem collection throughout your playthrough and take the escape route when offered in the final act without attempting the rescue sequence.
Bad Ending 2: The Corruption
The second bad ending requires more specific conditions and is considered the most disturbing conclusion in the game. Without the Star Brooch and an incomplete gem collection, the ritual Alfred has been preparing reaches a partial completion. Aya is not saved from the mansion’s curse — she is, in a sense, absorbed by it. The ending implies she will continue her father’s work, completing the cycle of inherited monstrosity.
How to trigger it: Reach the final act without the Star Brooch. Allow the ritual sequence to proceed without interference.
The Good Ending: Escape and Loss
This is the ending most players will see on a first playthrough if they’ve been reasonably thorough but haven’t found every gem. Aya escapes the mansion. Her father’s fate is sealed — he does not survive. The narrative resolves with Aya leaving the Drevis legacy behind, scarred but functional. It is genuinely moving, and for many players it represents the “correct” emotional conclusion even if it isn’t the True Ending mechanically.
How to trigger it: Collect the majority of the gems (but not all 21), obtain the Star Brooch, and complete the rescue attempt in the final act.
The True Ending: The Doctor’s Daughter
This is the ending Mad Father wants you to work for, and it earns every bit of that effort. With all 21 Gems collected and all key items in hand, the full ritual can be properly interrupted, Alfred’s fate takes an unexpected turn, and the final scene — a quiet, domestic moment that initially seems like a happy resolution — reveals something deeply sinister in its final seconds. We won’t spoil the precise nature of this final image here, but it recontextualizes Aya’s entire arc and suggests the curse of the Drevis bloodline operates on a longer timeline than the game’s runtime.
For fans of narrative horror with deep lore, check out our guide to Slay the Princess — another choice-driven horror experience where every ending reveals something darker.
Full walkthrough for True Ending requirements is integrated into the Gems Checklist section below.
Blood Mode and IF Mode Explained
Blood Mode: Restoring the Dark
Blood Mode is a toggle available from the Remake’s settings menu. When activated, it increases the visibility and graphic intensity of the game’s violence — including more explicit depictions of Alfred’s experiments, the fate of certain characters in the basement, and several death sequences involving Aya herself. In some regional versions of the Classic, content had been softened for release; Blood Mode effectively restores the game’s intended tone.
For lore purposes, Blood Mode doesn’t add new narrative information but it does make the thematic stakes of Alfred’s obsession considerably more visceral. Seeing the results of his work in full detail transforms him from an absent-minded eccentric into something genuinely monstrous, which makes Aya’s persistent love for him all the more tragic and uncomfortable.
Recommendation: First-time players sensitive to graphic content should play without it. Returning players and lore enthusiasts should enable it for the intended experience.
IF Mode: The Alternate Timeline
IF Mode is the Remake’s most significant addition and arguably one of the most interesting pieces of content in the entire game. Unlocked after completing the main story, IF Mode presents an alternate timeline in which key events of the main game unfold differently. Without venturing too far into spoiler territory before its designated section, IF Mode explores what might have happened if Aya had made different choices — and introduces new scenes, new dialogue, and a deeper look at the relationship between Aya, Alfred, and the entity known as the Ogre.
Critically, IF Mode adds several scenes involving Maria, the Drevis family’s housekeeper, that weren’t present in the Classic. These scenes are essential to understanding her true motivations and her relationship with Alfred that goes considerably beyond professional loyalty. IF Mode also expands on the nature of the curse itself, offering an explanation for several elements of the mansion’s geography that the main game leaves ambiguous.
How to unlock IF Mode: Complete the main game and reach any ending. IF Mode will become accessible from the main menu.
IF Mode is not a replacement for the main story — it is best understood as supplementary material, the way a director’s cut adds scenes that deepen rather than replace the theatrical experience. Play the main game first, reach the True Ending, then engage with IF Mode as your final act of investigation into the Drevis tragedy.
If you’re drawn to love-horror hybrids with layered storytelling, our deep dive into Doki Doki Literature Club’s horrors and secrets is essential reading.
The 21 Gems Checklist: Every Location
Finding all 21 Gems is the single most demanding completionist task in Mad Father and is mandatory for the True Ending. Gems are scattered across every major area of the mansion and are easy to miss, particularly during timed sequences when the Chainsaw-wielding Alfred is in pursuit.
The gems are listed here in rough chronological order of encounter. Items marked with ⚠️ are commonly missed.
Chapter 1 — The Upper Mansion
- Gem 1: Foyer, examine the painting of the woman in red to the left of the main staircase.
- Gem 2: Master bedroom, inside the jewelry box on the vanity. Requires interacting with the music box first to unlock the drawer.
- Gem 3: Library — solve the book-order puzzle (see below) to reveal the hidden compartment behind the bookcase.
- Gem 4 ⚠️: Child’s playroom, hidden inside the stuffed bear on the rocking chair. Interact with it three times.
- Gem 5: Upstairs bathroom, examine the bathtub drain after it empties during the story sequence.
Library Puzzle Solution: The bookshelves in the library must be interacted with in the correct order. Examine the books by color: Red → Blue → Yellow → Green. This mirrors the color order of the stained glass window visible through the library’s high window. The bookcase slides to reveal Gem 3 and a note that contributes to the game’s lore.
Chapter 2 — The Laboratory
- Gem 6: Specimen room, inside the third jar from the left on the middle shelf.
- Gem 7: Operating theater, examine the surgical tray after the story cutscene concludes.
- Gem 8 ⚠️: During the first Chainsaw chase sequence, there is a brief alcove to the right before the door. Ducking into it and waiting for Alfred to pass allows Aya to grab the gem from the wall shelf. Most players run past this entirely.
- Gem 9: Chemical storage room, combine the Blue Vial and Clear Vial at the workbench to trigger a reaction that reveals a hidden floor panel.
- Gem 10: Alfred’s private office, read all four journal entries on his desk. The fourth entry triggers a desk drawer to unlock.
Chapter 2 — The Basement Cells
- Gem 11: First cell block, examine the far wall of the rightmost cell.
- Gem 12: Speak to the ghost of the woman in the blue dress (she appears only if you’ve read Gem 10’s journal entry — another reason sequence matters).
- Gem 13 ⚠️: The flooded corridor. Requires the Rubber Boots acquired earlier. Wade through to the alcove — skipping the boots makes this section impassable and the gem permanently missable in this run.
- Gem 14: Torture chamber (Blood Mode makes this room significantly more disturbing), examine the iron maiden from the right side.
The Jailbreak Puzzle Solution: To free the imprisoned spirit in Cell 4 and access the eastern basement corridor, Aya must find the Iron Key (dropped by the animated skeleton in the storage room after it’s doused with the Holy Water from the chapel) and use it on the cell door. This sequence is missable if you use the Holy Water elsewhere — do not use it on the monster in the garden. That encounter can be bypassed by running along the fence.
Chapter 3 — The Garden and Chapel
- Gem 15: Garden, examine the flower bed to the right of the stone angel statue.
- Gem 16 ⚠️: Behind the chapel altar. Requires completing the candle-lighting sequence in the correct order (North → South → West → East) to temporarily dispel the barrier.
- Gem 17: Cemetery section, read the inscriptions on all five gravestones. The fifth gravestone triggers a partial ground collapse revealing a buried chest.
Chapter 4 — The Deep Mansion (Final Act)
- Gem 18: Hidden room accessible only by examining the cracked wall in the portrait gallery three times. Requires the Chisel obtained from the garden shed.
- Gem 19: Alfred’s original childhood bedroom (unlocked via the IF Mode-adjacent memory sequence). Examine the toy box.
- Gem 20 ⚠️: Ritual preparation room. There is a strict time limit in this area. The gem is inside the cabinet on the left wall. Players who rush the story sequence miss it permanently.
- Gem 21: Final room before the confrontation. Examine the offering bowl on the stone altar before triggering the boss sequence. This is the single most commonly missed gem in the game, as the vast majority of players are focused on the approaching climax.
With all 21 Gems in hand, you are equipped for the True Ending. Do not enter the final confrontation without confirming your count.
Lore Analysis: The Drevis Family Tragedy
Aya Drevis: Love as Survival Mechanism
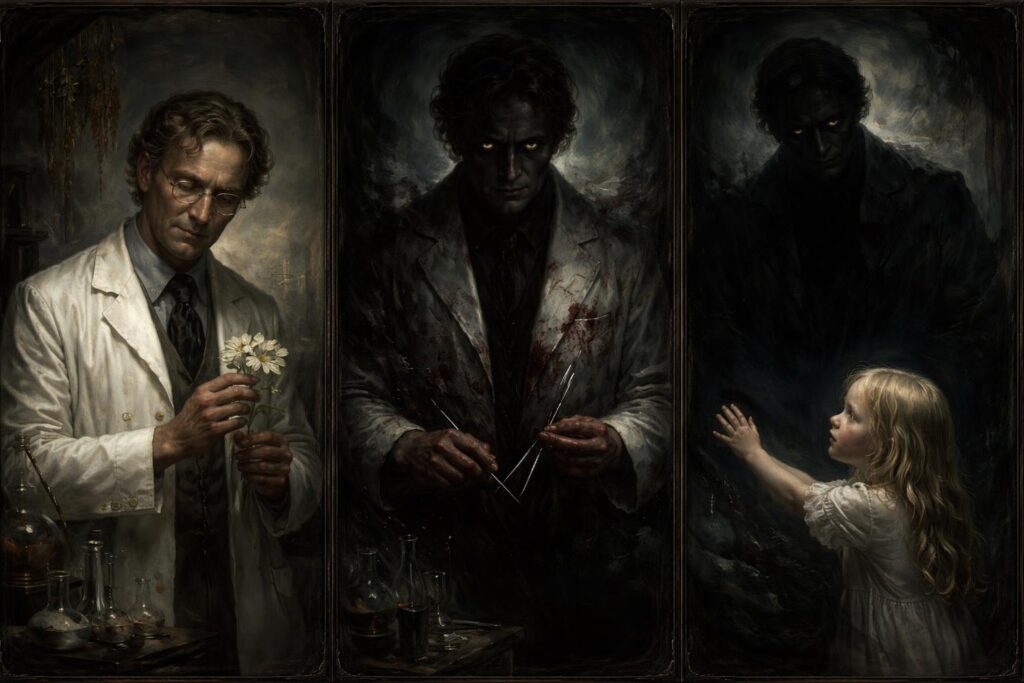
The Aya Drevis story is, at its core, a study in how children metabolize the incomprehensible. Aya idolizes her father. She calls him “Daddy” with a warmth that persists even as she witnesses the evidence of his crimes throughout the mansion. She is not naive — the game gives her enough intelligence and agency to navigate genuine horror — but she has constructed her love for Alfred as a survival mechanism. To acknowledge what he is would be to lose the one anchoring relationship in her world, and so she doesn’t. Not fully. Not until the True Ending forces her to.
This is what elevates Mad Father above simple shock horror. Aya’s psychology is rendered with genuine sophistication for a game made in RPG Maker, and the horror of the ending isn’t a monster or a jump scare — it’s the implication of inheritance.
Alfred Drevis: The Obsession Behind the Science
Alfred is brilliant, charming in the brief moments of warmth the game allows him, and utterly monstrous. His obsession with preserving beauty — specifically, arresting the biological process of decay — began with grief and calcified into something evil. The journals scattered throughout the mansion chart this deterioration with uncomfortable precision. He did not begin as a villain. He ended as one. The road between those two points is the game’s truest horror.
The Ogre’s True Identity
The entity Aya encounters periodically throughout the mansion — referred to in player circles as the Ogre — is one of the most discussed elements of the game’s lore. Without detailing every interpretive thread, the most textually supported reading is that the Ogre represents Alfred’s earliest victim, a man who came to the Drevis estate seeking help and became the first subject of Alfred’s experiments. The Ogre’s recurring appearances are not random hauntings — they follow a specific geographic pattern that mirrors Alfred’s documented early work, and his behavior toward Aya shifts from threatening to almost protective over the course of the game.
IF Mode adds two scenes that make this reading considerably more explicit, including a moment in which the Ogre and Maria occupy the same frame in a way that implies a prior relationship. This is one of the most significant lore expansions in the Remake.
Maria and the Willing Accomplice
Maria is arguably the most morally complex figure in the game. She enables Alfred’s work, protects it from discovery, and participates actively in its continuation — but her motivations are not simple fanaticism. The Remake’s expanded scenes suggest her loyalty is personal rather than ideological. She is not a true believer in Alfred’s science. She is a woman who made a catastrophic choice for human reasons and cannot find a way back from it. This reading makes her far more tragic and considerably more chilling than a straightforward villain.
The theme of inherited darkness also runs through Signalis, a sci-fi horror game with equally dense lore that rewards patient analysis.
FAQ: Your Questions Answered
This guide covers the Mad Father Remake (2020) and Classic (2012) in full. All gem locations, endings, and lore interpretations are based on complete playthroughs of both versions. If you found this walkthrough useful, the greatest contribution you can make to the Mad Father community is passing it forward — this game deserves to be discovered.